Showing posts with label Window XP. Show all posts

Tuesday, July 30, 2013

How to Auto Shutdown and Restart Windows XP and 7

Have you been in a situation where you had to wait for an update to finish so you could shutdown your computer and restart it again? Have you tried using software that only seems to confuse you? Well, there is an easy and sure solution for this and works well in Windows XP and Windows 7. How about Windows Vista? The similarities of Vista and 7 make it also possible for Vista users to apply this solution. Now remember this has nothing to do with starting your PC at a preset time of the day. This is about auto shutdown and restart only.
Auto Shutdown and Restart
1. Go to Desktop and right click. A menu will then pop out. Mouse over on New€ then click a €œMake New Shortcut€ or simply a€œ Shortcut€.
                          
2. Type the following: for shutdown shutdown -s -t 60 and restart shutdown -r -t 60 . Where €œ-s€ is for shutdown, €œ-r€ restart and €œ-t€ for how long before the command will be executed. Remember that the 60 stands for 60 seconds or 1 minute before the execution of the program. So if you want to execute the program after 2 hours simply use this formula: 60 seconds x 120 minutes= 7,200 seconds. Simply put, if you want your computer to shutdown after 2 hours replace 60 with 7200. If this still sounds confusing just remember this formula. Number of hours x 60 minutes x 60 second= number of Seconds.
    
3. Click Next and type any name that you want for the shortcut and then click finish.
       
4. After the shortcut has been made you will find it placed in your desktop. Now, the shutdown has not yet been activated. To activate it simply double click on the shortcut. Once it is activated you will see the following confirmation on your taskbar. 
Note: This is Windows 7 notification.
       
Note: Many Windows 7 users might experience no reaction or notification after activating the auto shutdown or restart. When there is no notification that means the auto shutdown or restart did not activate or failed to activate in the first place. There is nothing wrong with your computer. It i€™s simply Windows 7 system be all messed up. Solution: We need to do a clean boot.A  If this happens follow the steps below:
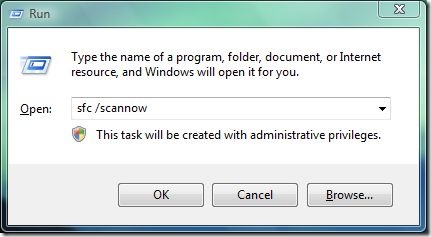
1. Go to Start and type €œrun.€
2. Then type msconfig.
3. Go to €œServices tab and disable all services. (Dona€™t worry all Microsoft Services will run again after reboot).
4. Go to Startup tab and disable all startup progams.
5. Reboot/Restart your computer. Your Auto shutdown should now work after the reboot/restart.
6. Go back to €œmsconfig and tick those services you want to automatically startup after booting up next time.

Sunday, June 16, 2013

TRANSFORM WINDOWS XP TO WINDOWS 8 | TRANFORMATION PACK FOR XP/2003

No matter which Windows version update came, there are still some of our readers sticked to Windows XP. Sometimes, the reason is the compatibility of software programs they use or low system requirements compared to Vista and Windows 7. In this course, they miss out the flavour of updated Windows interface but transformation packs come to rescue.
Windows 8 interface is in talks since when its official teaser was released. We have already seen How to transform Windows 7 to Windows 8 bringing Live Tiles interface.
And now, even Windows Xp users can take advantage of transforming their OS interface into Windows 8. Though, not bringing all the sophisticated features like Windows 8 Live Tiles but atleast imitate appearance by tweaking many basic features.
windows 8 transformation pack for xp Transform Windows XP to Windows 8 | Tranformation Pack for XP / 2003
Windows Transformation Pack named “Eight Remix 2.0” developed by Niwardsoft is capable of turning Windows Xp to Windows 8.

How to transform Windows Xp to Windows 8

Download Eight Remix XP
Installer is just 19.2 MB but takes 182 MB of space on Hard Disk after installation. It replaces almost all system files responsible for Windows XP Visual appearance.
windows 8 transformation xp Transform Windows XP to Windows 8 | Tranformation Pack for XP / 2003
Make sure you check on “create restore point” as we are going to change System Files. Installation takes quite long to complete and you will need to restart the system to take effect all the changes made.
windows 8 logon screen for xp 2003 Transform Windows XP to Windows 8 | Tranformation Pack for XP / 2003
Right from Logon Screen, you will start experiencing changes visually. Start button, Taskbar and Window Interface is given a glassy look. There is a ‘Show Desktop’ button like thing at the right-end of taskbar but it isn’t actually. You can install Show Desktop button on XP however afterwards.
Program features a nice tool called “Reloader” which will reset all the icons and appearance changes in case you or Windows Update mess up something with system files.
Also, it has clean uninstall option which will remove all the components of Remix Theme and revert back to default Windows XP theme restoring all default theme files in case you feel like.
Note: This is a standalone program and no manual tweaks required. Compatible with all variants of  Windows XP 32 Bit and Windows 2003. Doesn’t Support 64 Bit Windows OS.

Thursday, June 13, 2013

How To Fix Windows Xp Corrupted File

How to easily fix Windows xp corrupted files. Its work perfectly on windows xp and might works on windows 7 and windows vista also. Just follow below instruction to fix your corrupted window.


     REQUIREMENTS
  • PC Running Windows xp
  • Windows XP CD
                    

     HOW TO DO THAT ?
  • Place Windows XP cd in your CD/DVD drive.
  • Then Go to Start > Run 
  • Type in sfc /scannow
  • Now your XP will run fine

Thursday, April 25, 2013

How to disable shutdown in XP ?

OS: Windows XP


This a registry tweak by which you can prevent others to shut down your computer. This can be useful when you are doing some work & don't want your PC get shut down due to interference of other person. If you own a server then this is a tip which you must use as you will not want your server to get down. To apply this tweak follow as given below :
  • Open Registry Editor(regedit.exe) in Run under Start Menu.
  • Navigate to :- 
  • HKEY_CURRENT_USER\Software\Microsoft\Windows\CurrentVersion\Policies\Explorer and to 
  • HKEY_LOCAL_MACHINE\SOFTWARE\Microsoft\Windows\CurrentVersion\Policies\Explorer
  • In both these locations create or modify the Dword value 'NoClose' & set it to 1. This will prevent windows from shutting down.
  • If you want windows to get shut down again then set the above value to 0.
In case you dont have Explorer in the above entries then you have to create them.

Friday, April 12, 2013

Tips to burn CD on windows XP without software

If you wish to write some data to CD/DVD from your computer, then your PC must have installed with CD-copy software. In Windows XP, it comes with a built-in CD-copy feature, but many people are not aware of it.

Tips to burn CD on windows XP without software

Everyone will install their favorite CD-copy software in system. It is still good to know about this built-in CD-copy feature from Windows XP. If you doesn't have CD-copy software, and you can't just install your favorite software to system, you can use this built-in CD-copy feature to write some data to a CD/DVD or erase data from re-writable CD/DVD. 
In this article I have explained about the built-in CD-copy feature and how can you burn CDusing this.

Requirements: You need to enable the CD-R feature on Windows XP.

Step 1: Insert a Formatted CD into the CD drive.
Step 2: Open "My Computer".
Step 3: Select the files/folders you want to copy to CD and press "Ctrl-c".
Step 4: Go back to the CD-ROM and press "Ctrl-V". At this time the files/folders will show like temporary files.
Step 5: On the left panel select "Write these files to CD".
Step 6: Then the "CD Writing Wizard" will appear with the default CD name. If you want, change the CD name and click "Next".
Step 7: The "CD Writing Wizard" starts to write files to the CD.
Step 8: The wizard will disappear after the writing process is complete. After this the CD-Rom will be ejected.

Speeding up menu of Window XP


How to Speeding up menu

Go to Start --> Run --> Regedt32

Go to HKEY_CURRENT_USER\Control Panel\Desktop

Locate the key called "MenuShowDelay" and it is probably set to 400.

Change that value to 150.
Reboot your computer.

You should notice a slight increase in the speed of your menu.

Speed Up Internet


Your computer slow down when you browse your local area network and connect to other computers that are sharing data? One of the most common causes of this slowdown is a feature of Windows Explorer that looks for scheduled tasks on remote computers. This effort can take some time on some computers and can really slow down your browsing. The window with which you are browsing the network may appear to freeze momentarily, as the system is waiting for a response from the remote computer.

Windows XP: Speeding Disk Access

Although this problem is a complex one, the solution is very simple. Instead of having to wait for the remote scheduled tasks, which is useless information to anyone who is not a system administrator remotely configuring scheduled tasks, you can disable this feature.

In order to do this, you will have to change the System Registry and delete a reference to a key so that this feature will not be loaded. To do this, follow these steps:

1. Open up the Registry Editor by clicking the Start Menu and selecting Run. Then type regedit in the text box and click the OK button.

2. Once the Registry Editor has loaded, expand the HKEY_LOCAL_MACHINE key.

3. Next, expand Software and then Microsoft.

4. Locate Windows and expand that as well.

5. You will want to be editing the main system files, so expand CurrentVersion.

6. Because this feature is a feature of the Windows component known as Explorer, expand the Explorer key.

7. Next, you will want to modify the remote computer settings, so expand the RemoteComputer key and then expand the NameSpace key to show all of the features that are enabled when you browse to a remote computer.

8. In the NameSpace folder you will find two entries. One is "{2227A280-3AEA-1069-A2DE-08002B30309D}" which tells Explorer to show printers shared on the remote machine. The other, "{D6277990-4C6A-11CF-8D87-00AA0060F5BF}," tells Explorer to show remote scheduled tasks. This is the one that you should delete. This can be done by right-clicking the name of the key and selecting Delete.

Tip:
If you have no use for viewing remote shared printers and are really only interested in shared files, consider deleting the printers key, "{2227A280-3AEA-1069-A2DE-08002B30309D}", as well. This will also boost your browsing speed.

Once you have deleted the key, you just need to restart and the changes will be in effect. Now your network computer browsing will be without needless delays.

Window XP Hidden APPS


To run any of these apps go to Start> Run and type the executable name (Eg. charmap.exe).


WINDOWS XP HIDDEN APPS:

1) Character Map = charmap.exe (very useful for finding unusual characters)

2) Disk Cleanup = cleanmgr.exe

3) Clipboard Viewer = clipbrd.exe (views contents of Windows clipboard)

4) Dr Watson = drwtsn32.exe (Troubleshooting tool)

5) DirectX diagnosis = dxdiag.exe (Diagnose & test DirectX, video & sound cards)

6) Private character editor = eudcedit.exe (allows creation or modification of characters)

7) IExpress Wizard = iexpress.exe (Create self-extracting / self-installing package)

8) Microsoft Synchronization Manager = mobsync.exe (appears to allow synchronization of files on the network for when working offline. Apparently undocumented).

9) Windows Media Player 5.1 = mplay32.exe (Retro version of Media Player, very basic).

10) ODBC Data Source Administrator = odbcad32.exe (something to do with databases)

11) Object Packager = packager.exe (to do with packaging objects for insertion in files, appears to have comprehensive help files).

12) System Monitor = perfmon.exe (very useful, highly configurable tool, tells you everything you ever wanted to know about any aspect of PC performance, for uber-geeks only )

13) Program Manager = progman.exe (Legacy Windows 3.x desktop shell).

14) Remote Access phone book = rasphone.exe (documentation is virtually non-existant).

15) Registry Editor = regedt32.exe [also regedit.exe] (for hacking the Windows Registry).

16) Network shared folder wizard = shrpubw.exe (creates shared folders on network).

17) File siganture verification tool = sigverif.exe

18) Volume Contro = sndvol32.exe (I've included this for those people that lose it from the System Notification area).

19) System Configuration Editor = sysedit.exe (modify System.ini & Win.ini just like in Win98! ).

20) Syskey = syskey.exe (Secures XP Account database - use with care, it's virtually undocumented but it appears to encrypt all passwords, I'm not sure of the full implications).

21) Microsoft Telnet Client = telnet.exe

22) Driver Verifier Manager = verifier.exe (seems to be a utility for monitoring the actions of drivers, might be useful for people having driver problems. Undocumented).

23) Windows for Workgroups Chat = winchat.exe (appears to be an old NT utility to allow chat sessions over a LAN, help files available).

24) System configuration = msconfig.exe (can use to control starup programs)

25) gpedit.msc used to manage group policies, and permissions.