Sunday, June 30, 2013

5 BEST TIPS TO INCREASE YOUR FACEBOOK FANPAGE LIKES

I have shared many tips and tricks on facebook in my older post, if you are new here then must check, well today i want to share some tips that i already used for increasing my facebook fan page likes, i got 500+ likes in 1 week, and now 20-30% traffic is form facebook as well, so you have created a facebook fan page but couldn’t get fans/likes? then do not worry about it, here is best 5 tips for you that you can increase your facebook fan page likes as well, so all tips are different and will 100% work for you, but you need to follow it with care, you thought i will tell you to post fresh content, share images instead of text, Run contests or use Facebook Adverts? then you are wrong i have another 5 tips instead of that all things.. so what for waiting?
 

(1)Automatically Increase Your Fan Page Likes Using  jQuery

Yes ! in my prevues post i have published a post on how to increase your facebook fan page likes automatically using jQuery, you need just add jQuery code into your blogger blog, with this script applied any unique visitor who comes to your page can become your fan. He just needs to click anywhere on the webpage as a small invisible like button will follow his mouse cursor and as soon he clicks anywhere he will be liking your fan page. so Try it now!

(2) Invite Your Friends To Like Your Page

The best chance of getting a response is to send a notification directly to your friends asking for support of your page via “like”.
So, Go to your facebook fan page –> click on Build Audience drop down menu –> there is many option available in build audience first “Invite E-mail Contacts”  Second option “invite your friends” Third “Share page, so you can use any option as you like to invite your friend to like your page, second one is the best option that will send your to friends a notification to like your page, build audience also allowed you to create an ad on facebook to gain page attention and likes.

1

(3) Add Facebook Like Box To Your Blog/Website

In my older post i shared many facebook widgets for blogger, you can use it easily, Facebook like box allows your readers to like your fanpage easily and they don’t need to find you manually. facebook developers have made this very easy to integrate a facebook like box in your blog by adding a few lines of code in it, so, 
simply visit the facebook developers page there you will see the like box generator then Customize the look and feel, height, width of your Like box from as you need, Once you are done with the customization, click on Get code. It would pop-up a window, then copy the iframe code and paste in your blog HTML/JavaScript widget and save it. that’s it.

(4) Add Facebook Like Button To End of post in Blog/Website

Put Facebook Like Button after the content of the article in your website or blog, so that when a user has finished reading your post, they notice the Like button immediately and Hit it. Visit the facebook developers page to get facebook like button code. and simply go to blogger–>edit html, CTRL+F to find </data:post.body> paste the like button code just above it and save your template now like button will show at ending of all post of your blog.

(5) Promote Your Fan Page On Other Top Pages

Yes, i also tried it, my one of friend have facebook page with 4 lac+ Indian fans/Likes, i just told him to share my page on their page, then i got many likes for my other page, so, this is last and best 5th tip, do promote your page in other pages, if you can’t find any top pages for promoting your fan page then commnt me. i’ll help for it.
Saturday, June 29, 2013

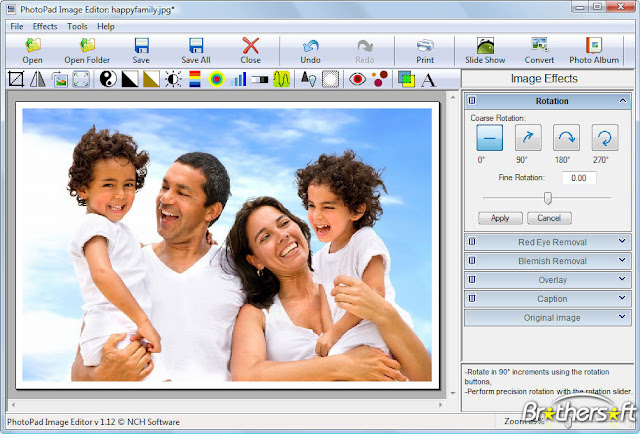
PhotoPad Photo Editor [Easily edit your digital photos]

PhotoPad picture editing software is a free digital photo editor for Windows or Mac OS X.
  • Easily edit digital photos and other pictures
  • Load multiple types of image formats
  • Crop, rotate, resize and flip photos fast 

PhotoPad photo editing software is now available for Mac OS X. If you own an apple computer and have digital photos or pictures you would like to touch up before you share them or print them out you will want to try PhotoPad for a free and easy way to edit your pictures. 

Not every photo needs a full blown airbrushing session. And, just like how not everyone who snaps a photo is a professional; not everyone who wants to edit a photo should have to use software that takes professional know how. That's where PhotoPad steps in, providing features to touch up blemishes, remove red eye, adjust the color or brightness, crop or rotate, and more all at your fingertips. So you can make your edits and post your photos before you could even download another photo editor. 

Whether you are a Mac or a PC, if you have pictures to edit download PhotoPad picture editing software for your computer today to make your digital photos shine.
 
PhotoPad is designed to be very easy and intuitive to use so you can quickly open and edit your photos.

Download PhotoPad Photo Editing SoftwareDownload PhotoPad Photo Editor for Windows 


PhotoPad Photo Editor is completely free to use, and we encourage you to try our othergraphics software including PhotoStage Slideshow Creator to combine your digital photos into custom video slideshows when you've finished editing.
Photo Editing Features
  • Crop, rotate and flip pictures
  • Apply effects such as sepia tones, grayscale, vignette, local blur and many more
  • Color adjust image hue, saturation, brightness and contrast
  • Preview photo filters and effects before applying
  • Touch up photos removing red-eye and blemishes
  • Add text and captions to photos
  • Create collages and photo mosaics with your photographs
  • Stitch together photos to make panoramas
  • Load gif, jpg, png, bmp and other image formats
  • Non-destructive editing allows easy modification or deletion of individual effects in the layers list
  • Upload edited pictures directly to Facebook or Flickr
  • Combine with PhotoStage SlideShow Software to create video slideshows of your edited photos.
System Requirements
  • Works on Windows 8, XP, Vista and 7
  • Works on Mac Intel OS X 10.3 and above
Download PhotoPad Picture Editing Software

Thursday, June 27, 2013

How To Edit YouTube Videos and Add Video Annotations

Using the YouTube Video Editor
To start with, if you are interested in customizing and enhancing your own video (or any video, for that matter), you will need to use a video editor. While there are many excellent standalone applications out there, there are also some useful online tools that you can use to make your video stand out from the crowd. The YouTube Video Editor is one such tool.
To use the YouTube Video Editor, you must sign into your YouTube (or Google) account. You are able to choose from videos that you have personally uploaded to YouTube or select from hundreds of Creative Commons videos that are copyright free. You are also able to make a selection of music from hundreds of audio tracks that YouTube provides to use along with your video(s).
When you select a video from either your own uploaded videos, or the Creative Commons videos, you are able to view it, or drag it down into the video path below the video listing, as shown below:
YouTube Editor
You can then add a transition (various transitions are provided, including fades, swipes and more) between that video and the next one you select by dragging the transition down to the video path just like you did with the video itself. Then you can add another video and repeat the process (you can actually add the videos first, then add the transitions if you wish).
Once you've arranged the videos and transitions, you can add an audio track by once again selecting the audio track, just like you did with the videos and transitions, and dragging it into the audio path, which is right below the video path, as you can see in the screenshot above.
Once you're satisfied with your videos and audio selections, you can publish your new video to your own YouTube channel by clicking the publish button on the top right of the page (again, you can see it in the image shown above). Here's what it looks like when it's published:
How To Add Annotations and Notes To Your YouTube Videos
When you view your video on YouTube, you can click the Edit Video Detail button which is directly above the video itself, on the left side of the screen. Once you do so, you will be able to edit the following details:
  • Title - this is the title that appears in the title bar of the browser, as well as on the page itself
  • Description - this is the description that appears under the video
  • Category - this is the category that the video will appear under when users are browsing YouTube
  • Tags - these are the tags that are used when users are searching for videos
  • License - this is the type of license that the video uses, whether Creative Commons or Standard YouTube License
Once you have edited the details, you will want to make sure your settings are correct, and YouTube provides an area for you to do just that:
YouTube Video Settings
You can also select a thumbnail for your video, based on the thumbnails that are taken from the video itself. If your video is locale-based, you can also select a map location, and set the details for 3D video, if your video was created in 3D. Now let's move on to annotations and notes!
Just like you selected Edit Video Detail when you were viewing your video on the YouTube page, you can also select Edit annotations:
Edit Tabs
Once you are at the Edit Annotations page, you will see your video along with an annotations selection area below it, as shown below:
Add Video Annotations
As the video plays, the bar in the annotations selection area also moves. At any point you are able to click the Add annotation dropdown on the right, which brings up the following dropdown that allows you to select from several different types of annotations:
Video Annotations Drop Down
Once you have selected the type of annotation, you are able to move the annotation where you want it on the video, enlarge it, and add the annotation (text) itself. You can also edit any existing annotations by selecting them in the dropdown Edit existing annotation field. When you are adding an annotation, you can also add a link to a website, and can specify when in the video that the link will appear (in seconds). Fortunately a timeline is provided below the video in the annotation selection area, so you won't have to guess. Here is our video with an annotation added:
Editing YouTube Video
If you would like additional information about creating and editing video annotations, YouTube has created a special page devoted to the topic.
Conclusion
As you can see, editing your videos and adding text, links and annotations to them is easy when you are using YouTube's own tools. If you have any comments or suggestions for this article, please don't forget to comment below!

Wednesday, June 26, 2013

Power Point Animation Painter


Expert Word and PowerPoint users know about the Format Painter tool, which you use to copy formatting from one paragraph in Word (or one object in PowerPoint) to another. PowerPoint 2010 adds a time-saving Animation Tool that works in essentially the same way. Click on the object that has an animation you want to use to animate another object; then click on the Animation Painter tool; finally click on the object to which you want to apply the animation.
Also Read :Insert Screen Clips in PowerPoint (or Word)

How to Recover Unsaved Documents in MS Office


Word, Excel, and PowerPoint all have a new feature that saves documents that you've neglected to save when you closed them—including documents that you haven't even bothered to save with a name more specific than "Document1." This feature builds on Office's long-standing autosave feature, which automatically backs up the current version of your document every ten minutes (or whatever interval you set in the app's options). Earlier versions of Office deleted the last of these automated backups when you closed a document, but Office 2010 preserves the last automated backup and lets you open it. Click File, Recent, Recover Unsaved Documents, and then choose the document from a standard File/Open dialog box.

Insert Screen Clips in PowerPoint (or Word)

               Insert Screen Clips in PowerPoint (or Word)

Word and PowerPoint now make it easy to insert screen captures into a document by selecting Screenshot from the Insert tab. Doing so launches a gallery of currently open windows, and you can click one to insert an image of the window into your document (or you can click Screen Clipping, and drag the mouse to select the screen region that you want to clip and paste into your document). When you press Enter, the screen capture gets inserted automatically.
Bonus tip: Here's how to get a screen shot of the app you're running—something that's normally impossible because Word and PowerPoint disappear while you drag the mouse to make a screen clip. If you want to make a screen shot of PowerPoint to use in PowerPoint (as I did in this image), simply use Word to take the screen shot, and drag the image from Word into PowerPoint.

Broadcast a Slideshow From Power Point

                 Broadcast a Slideshow From PowerPoint

The best new idea in PowerPoint is its built-in broadcast feature, which you can launch by

 opening a Presentation=> clicking File=> Save & Send=> Broadcast Slide Show=> clicking the Broadcast Slide Show button=> and then Start Broadcast. 

The first time you do this, you'll need to log in to Microsoft's free broadcast service with a Windows Live ID, but you can choose the option to log in automatically in the future. When the broadcast is ready, the dialog box will display a Send in Email link, which you can use to send an invitation link to your audience (buttons on the ribbon let you send out additional invites). To begin the broadcast, click the Start Slide Show button.

MS Excel All Usefull shortcuts Keys for the Office interface


      -:      Keys for the Office interface      :-

Display and use windows
TO DO THISPRESS
Switch to the next program.ALT+TAB
Switch to the previous program.ALT+SHIFT+TAB
Display the Windows Start menu.CTRL+ESC
Close the selected workbook window.CTRL+W or CTRL+F4
Restore the window size of the selected workbook window.CTRL+F5
Switch to the next pane in a worksheet that has been split (Windowmenu, Split command).
F6
 NOTE   When the task pane is visible, F6 includes that pane when switching between panes.
Switch to the previous pane in a worksheet that has been split.
SHIFT+F6
 NOTE   When the task pane is visible, SHIFT+F6 includes that pane when switching between panes.
When more than one workbook window is open, switch to the next workbook window.CTRL+F6
Switch to the previous workbook window.CTRL+SHIFT+F6
When a workbook window is not maximized, perform the Movecommand (on the Control menu for the workbook window). Use the arrow keys to move the window, and when finished press ESC.CTRL+F7
When a workbook window is not maximized, perform the Sizecommand (on the Control menu for the workbook window). Use the arrow keys to resize the window, and when finished press ENTER.CTRL+F8
Minimize a workbook window to an icon.CTRL+F9
Maximize or restore the selected workbook window.CTRL+F10
Copy a picture of the screen to the Clipboard.PRTSCR
Copy a picture of the selected window to the Clipboard.ALT+PRINT SCREEN

Access and use smart tags
TO DO THISPRESS
Display the menu or message for a smart tag. If more than one smart tag is present, switch to the next smart tag and display its menu or message.ALT+SHIFT+F10
Select the next item in a smart tag menu.DOWN ARROW
Select the previous item in a smart tag menu.UP ARROW
Perform the action for the selected item in a smart tag menu.ENTER
Close the smart tag menu or message.ESC
Access and use task panes
TO DO THISPRESS
Move to a task pane from another pane in the program window. (You may need to press F6 more than once.)
F6
 NOTES 
  • If pressing F6 doesn't display the task pane you want, try pressing ALT to place focus on the menu bar, and then pressing CTRL+TAB to move to the task pane.
  • In a worksheet that has been split (Window menu, Splitcommand), F6 includes the split panes when switching between panes.
When a menu or toolbar is active, move to a task pane. (You may need to press CTRL+TAB more than once.)CTRL+TAB
When a task pane is active, select the next or previous option in the task paneTAB or SHIFT+TAB
Display the full set of commands on the task pane menuCTRL+SPACEBAR
Move among choices in a selected submenu; move among certain options in a group of optionsDOWN ARROW or UP ARROW
Open the selected menu, or perform the action assigned to the selected buttonSPACEBAR or ENTER
Open a shortcut menu; open a drop-down menu for the selected gallery itemSHIFT+F10
When a menu or submenu is visible, select the first or last command on the menu or submenuHOME or END
Scroll up or down in the selected gallery listPAGE UP or PAGE DOWN
Move to the top or bottom of the selected gallery listCTRL+HOME or CTRL+END
Access and use menus and toolbars
TO DO THISPRESS
Select the menu bar, or close an open menu and submenu at the same time.F10 or ALT
When a toolbar is selected, select the next or previous button or menu on the toolbar.TAB or SHIFT+TAB
When a toolbar is selected, select the next or previous toolbar.CTRL+TAB or CTRL+SHIFT+TAB
Open the selected menu, or perform the action for the selected button or command.ENTER
Display the shortcut menu for the selected item.SHIFT+F10
Display the Control menu for the Excel window.ALT+SPACEBAR
When a menu or submenu is open, select the next or previous command.DOWN ARROW or UP ARROW
Select the menu to the left or right. When a submenu is open, switch between the main menu and the submenu.LEFT ARROW or RIGHT ARROW
Select the first or last command on the menu or submenu.HOME or END
Close an open menu. When a submenu is open, close only the submenu.ESC
Display the full set of commands on a menu.CTRL+DOWN ARROW
Show or hide the Standard toolbar.CTRL+7
 NOTE:-You can select any menu command on the menu bar or on a displayed toolbar with the keyboard. To select the menu bar, press ALT. Then to select a toolbar, press CTRL+TAB repeatedly until you select the toolbar you want. Press the underlined letter in the menu that contains the command you want. In the menu that appears, press the underlined letter in the command that you want.
Resize and move toolbars and task panes

1. Press ALT to select the menu bar.
2. Press CTRL+TAB repeatedly to select the toolbar or task pane you want.3. Do one of the following:
  * Resize a toolbar

  • In the toolbar, press CTRL+SPACE to display the Toolbar Options menu.
  • Select the Size command, and then press ENTER.
  • Use the arrow keys to resize the toolbar.
  * Move a toolbar
  • In the toolbar, press CTRL+SPACE to display the Toolbar Options menu.
  • Select the Move command, and then press ENTER.
  • Use the arrow keys to position the toolbar. Press CTRL+ the arrow keys to move one pixel at a time. To undock the toolbar, press DOWN ARROW repeatedly. To dock the toolbar vertically on the left or right side, press LEFT ARROW or RIGHT ARROW respectively when the toolbar is all the way to the left or right side.
  * Resize a task pane
  • In the task pane, press CTRL+SPACE to display a menu of additional commands.
  • Use the DOWN ARROW key to select the Size command, and then press ENTER.
  • Use the arrow keys to resize the task pane. Use CTRL+ the arrow keys to resize by one pixel at a time.
  * Move a task pane
  • In the task pane, press CTRL+SPACE to display a menu of additional commands.
  • Use the DOWN ARROW key to select the Move command, and then press ENTER.
  • Use the arrow keys to position the task pane. Use CTRL+ the arrow keys to move one pixel at a time. 
4. When you are finished moving or resizing, press ESC.
 
Use dialog boxes
TO DO THISPRESS
Move to the next option or option group.TAB
Move to the previous option or option group.SHIFT+TAB
Switch to the next tab in a dialog box.CTRL+TAB or CTRL+PAGE DOWN
Switch to the previous tab in a dialog box.CTRL+SHIFT+TAB or CTRL+PAGE UP
Move between options in an open drop-down list, or between options in a group of options.Arrow keys
Perform the action for the selected button, or select or clear the selected check box.SPACEBAR
Open the list if it is closed and move to that option in the list.First letter of an option in a drop-down list
Select an option, or select or clear a check box.ALT+ the underlined letter in an option
Open the selected drop-down list.ALT+DOWN ARROW
Perform the action for the default command button in the dialog box (the button with the bold outline, often the OK button).ENTER
Cancel the command and close the dialog box.ESC
Use edit boxes within dialog boxes
An edit box is a blank in which you type or paste an entry, such as your user name or the path to a folder.
TO DO THISPRESS
Move to the beginning of the entry.HOME
Move to the end of the entry.END
Move one character to the left or right.LEFT ARROW or RIGHT ARROW
Move one word to the left.CTRL+LEFT ARROW
Move one word to the right.CTRL+RIGHT ARROW
Select or unselect one character to the left.SHIFT+LEFT ARROW
Select or unselect one character to the right.SHIFT+RIGHT ARROW
Select or unselect one word to the left.CTRL+SHIFT+LEFT ARROW
Select or unselect one word to the right.CTRL+SHIFT+RIGHT ARROW
Select from the insertion point to the beginning of the entry.SHIFT+HOME
Select from the insertion point to the end of the entry.SHIFT+END
Use the Open, Save As, and Insert Picture dialog boxes
The Open, Insert Picture, and Save As dialog boxes support standard dialog box keyboard shortcuts. (To view standard shortcuts for dialog boxes, refer to the Use Dialog Boxes and Use Edit Boxes Within Dialog Boxes sections in the main Keyboard Shortcuts topic.) These dialog boxes also support the shortcuts below. 
TO DO THISPRESS
Go to the previous folder Button imageALT+1
Up One Level Button image button: open the folder up one level above the open folderALT+2
Search the Web Button image button: close the dialog box and open your Web search pageALT+3
Delete Button image button: delete the selected folder or fileALT+4
Create New Folder Button image button: create a new folderALT+5
Views Button image button: switch among available folder viewsALT+6
Tools button: show the Tools menuALT+7 or ALT+L
Display a shortcut menu for a selected item such as a folder or fileSHIFT+F10
Move between options or areas in the dialog boxTAB
Open the Look in listF4 or ALT+I
Refresh the file listF5
Use the Help task pane and Help window
The Help Pane is a task pane that provides access to all Office Help content. As a task pane, the Help Pane appears as part of the active application. The Help window displays topics and other Help content and appears as a window next to, but separate from, the active application.

In the Help task pane

TO DO THISPRESS
Display the Help task pane.F1
Switch between the Help task pane and the active application.
F6
 NOTE   In a worksheet that has been split (Window menu, Splitcommand), F6 includes the split panes when switching between panes.
Select the next item in the Helptask pane.TAB
Select the previous item in the Helptask pane.SHIFT+TAB
Perform the action for the selected item.ENTER
In a Table of Contents, select the next and previous item, respectively.DOWN ARROW and UP ARROW
In a Table of Contents, expand and collapse the selected item, respectively.RIGHT ARROW and LEFT ARROW
Move back to the previous task Pane.ALT+LEFT ARROW
Move forward to the next task Pane.ALT+RIGHT ARROW
Open the menu of Pane options.CTRL+SPACEBAR
Close and reopen the current task pane.CTRL+F1
Expand a +/- list.RIGHT ARROW
Collapse a +/- list.LEFT ARROW
 In the Help window
TO DO THISPRESS
Select the next hidden text or hyperlink, or Show All or Hide All at the top of a topicTAB
Select the previous hidden text or hyperlink, or the Browser View button at the top of a Microsoft Office Web site articleSHIFT+TAB
Perform the action for the selected Show All, Hide All, hidden text, or hyperlinkENTER
Move back to the previous Help topic.ALT+LEFT ARROW
Move forward to the next Help topic.ALT+RIGHT ARROW
Print the current Help topic.CTRL+P
Scroll small amounts up and down, respectively, within the currently-displayed Help topic.UP ARROW AND DOWN ARROW
Scroll larger amounts up and down, respectively, within the currently-displayed Help topic.PAGE UP AND PAGE DOWN
Change whether the Help window appears connected to (tiled) or separate from (untiled) the active application.ALT+U
Display a menu of commands for the Help window; requires that the Help window have active focus (click an item in the Help window).SHIFT+F10